Appearance
Week 3 Prep · Install MongoDB
Do this before class on Tuesday 9/22. We start using Mongo immediately in lecture, and setup problems are much easier to sort out beforehand than while everyone else is coding.
You need three things working:
- MongoDB Community Edition installed
mongosh(the Mongo shell) available on your command line- MongoDB Compass installed, and connecting to your local server
If you get stuck, post in Slack — don't wait until Tuesday.
1. Install MongoDB Community Edition
Follow MongoDB's installation instructions for your platform. The current release is 8.3, and installing the latest is fine.
Two things worth knowing before you start:
Windows: MongoDB 8.x supports Windows 11 and Windows Server 2022. Windows 10 is not on the supported platform list. If you're on Windows 10, your options are to upgrade, run Mongo in Docker, or talk to us — come find us early rather than on Tuesday.
mongosh may be a separate install. On some platforms the server package doesn't include the shell. After installing, run mongosh --version in a terminal. If that isn't found, install it separately following the mongosh instructions.
2. Install MongoDB Compass
There are two ways to look at your data: mongosh, a command-line interface, and Compass, a GUI. Both are worth having — we'll use each at different points in the course.
Install Compass for your platform.
3. Start the server
Nothing can connect to Mongo — not mongosh, not Compass, not your Express app — unless the server process mongod is running.
Your platform's install instructions will describe one or both of:
- Running it as a background service, so it starts with your machine and you never think about it again. Usually the least hassle for local development, and worth preferring if your platform's instructions offer it.
- Running
mongodmanually whenever you need it. Fine too, but you'll need to remember to start it before you start coding.
Running mongod with no arguments uses the defaults, including port 27017. You can override those defaults if you have a reason to.
If mongod won't stay running
It may need a data directory that doesn't exist yet. Create one and point mongod at it:
shell
# macOS / Linux
mkdir -p ~/data/mdata
mongod --dbpath ~/data/mdata
shell
# Windows
mkdir c:\data\mdata
mongod --dbpath c:\data\mdata
Any directory you can write to will do.
4. Verify it works
Do both of these. They're the same check through two different tools, and you'll be using both this term.
With mongosh
Run mongosh from the command line. It connects to the default localhost:27017.
- A prompt like
test >means everything is working. MongoNetworkError: connect ECONNREFUSEDmeans nothing is listening — the server isn't running. Check the terminal where you startedmongod, or check the service status.
With Compass
Open Compass. You should see a welcome screen offering a new connection.
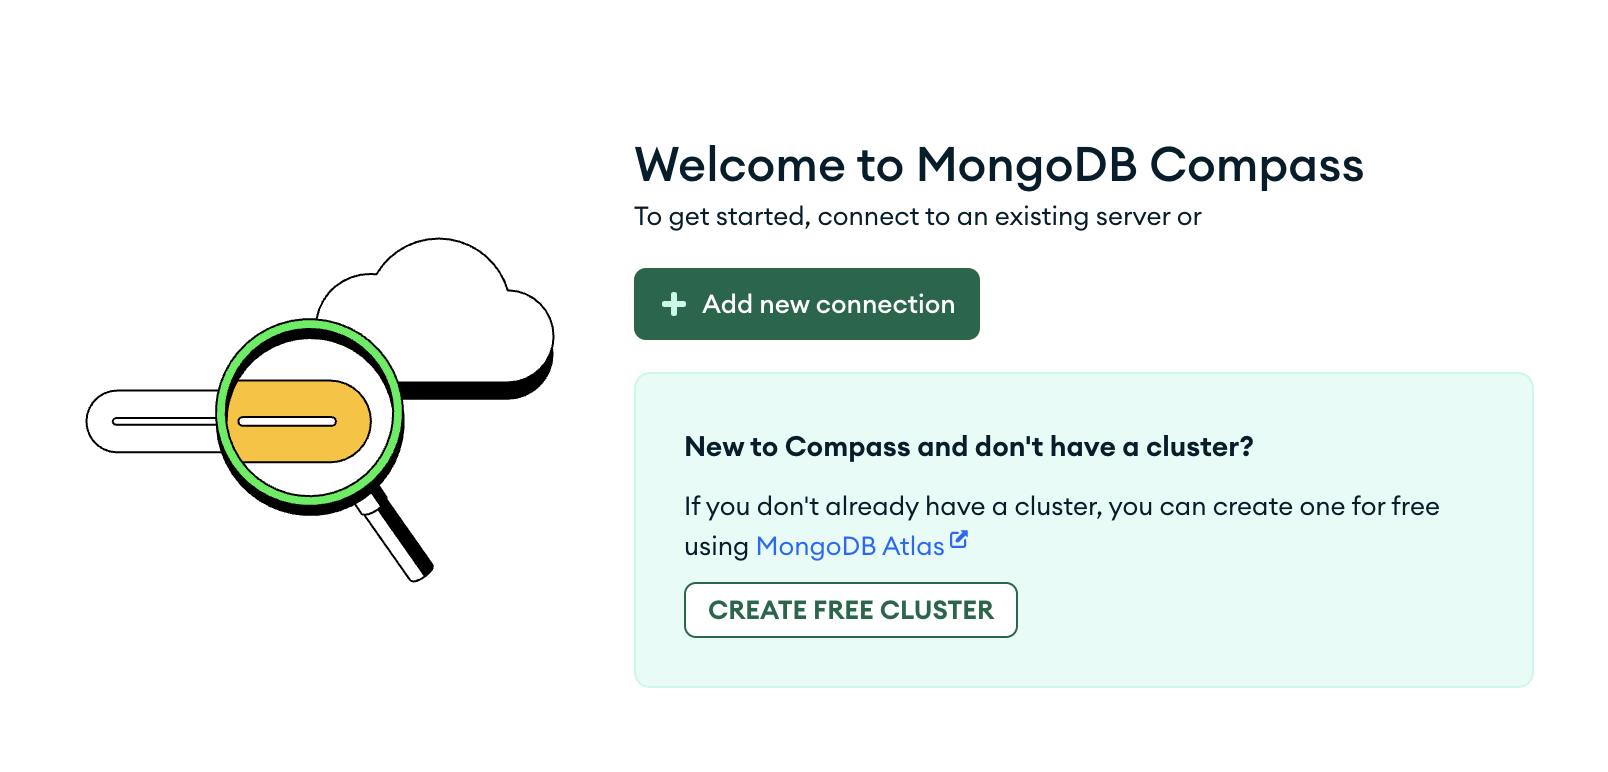
Click Add new connection. A New Connection dialog opens with a URI field. The default is usually correct; if not, set it to mongodb://localhost:27017.
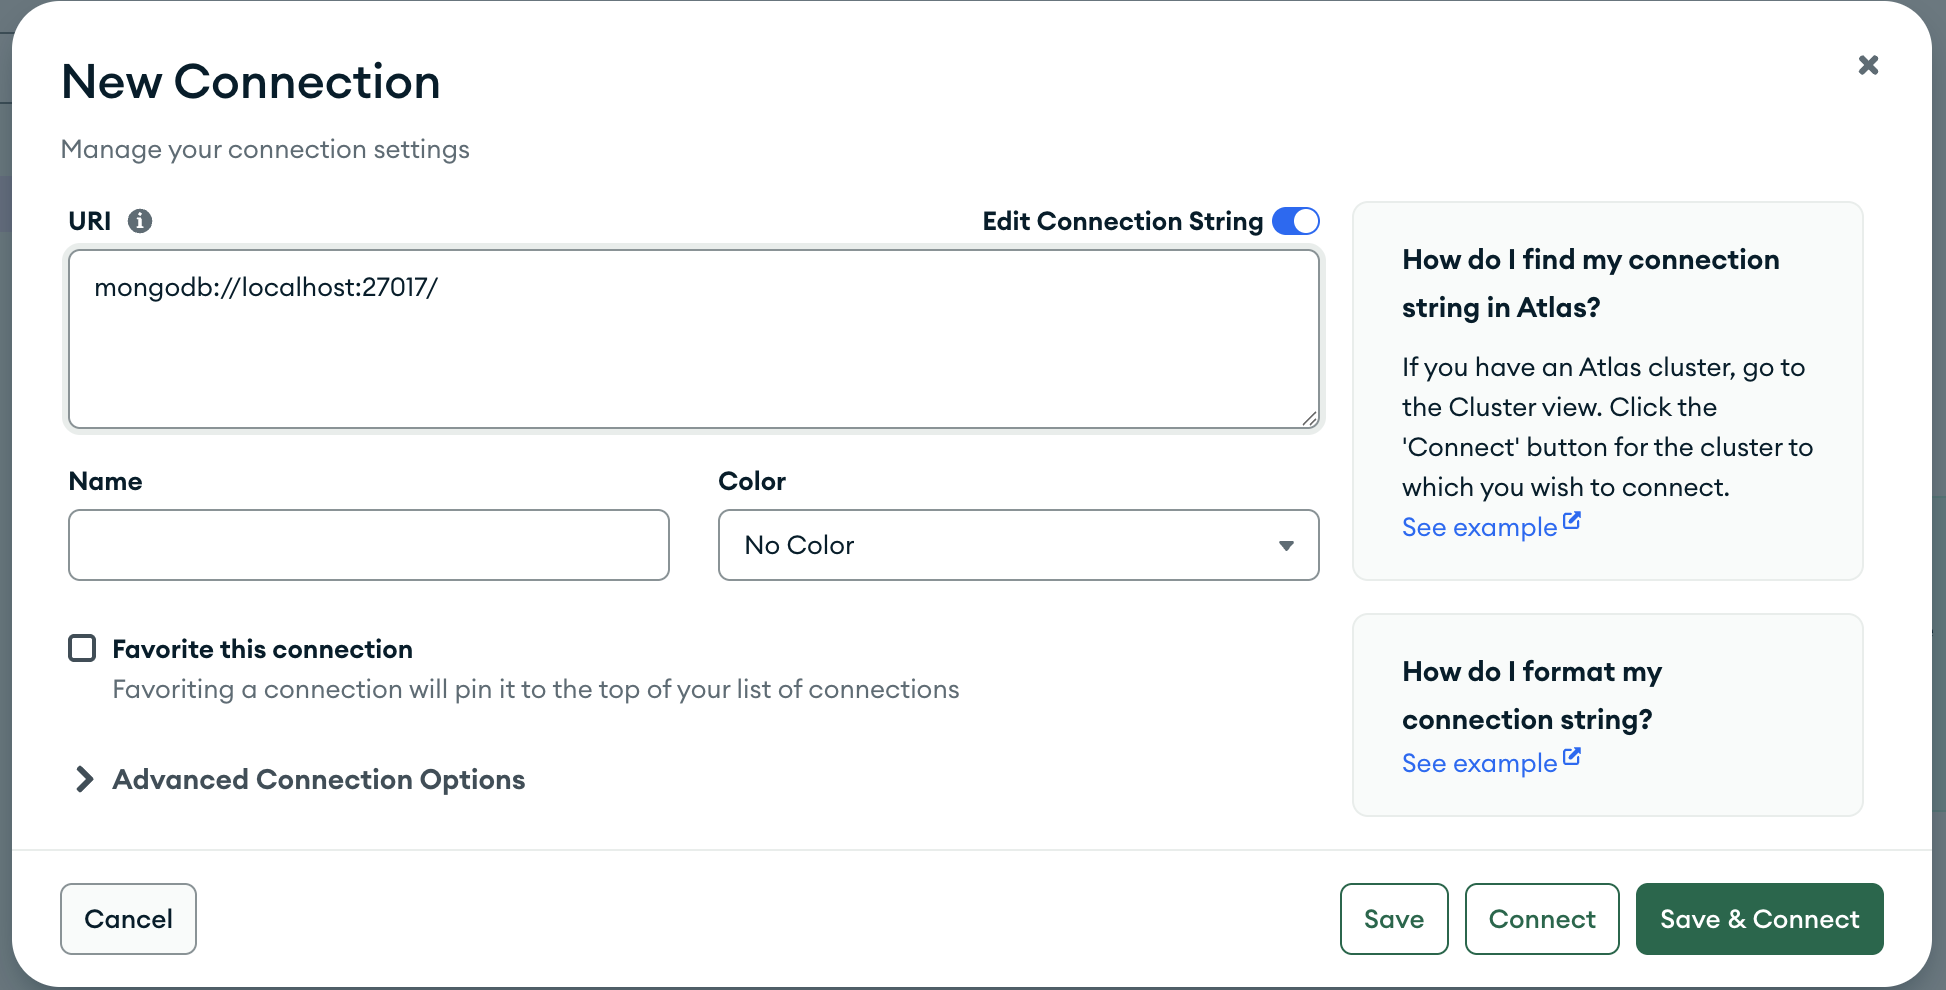
Then click Connect.
Once connected, expand the connection in the left sidebar. You should see three databases — admin, config and local. Mongo creates those itself, so seeing them means you're talking to a real, working server.
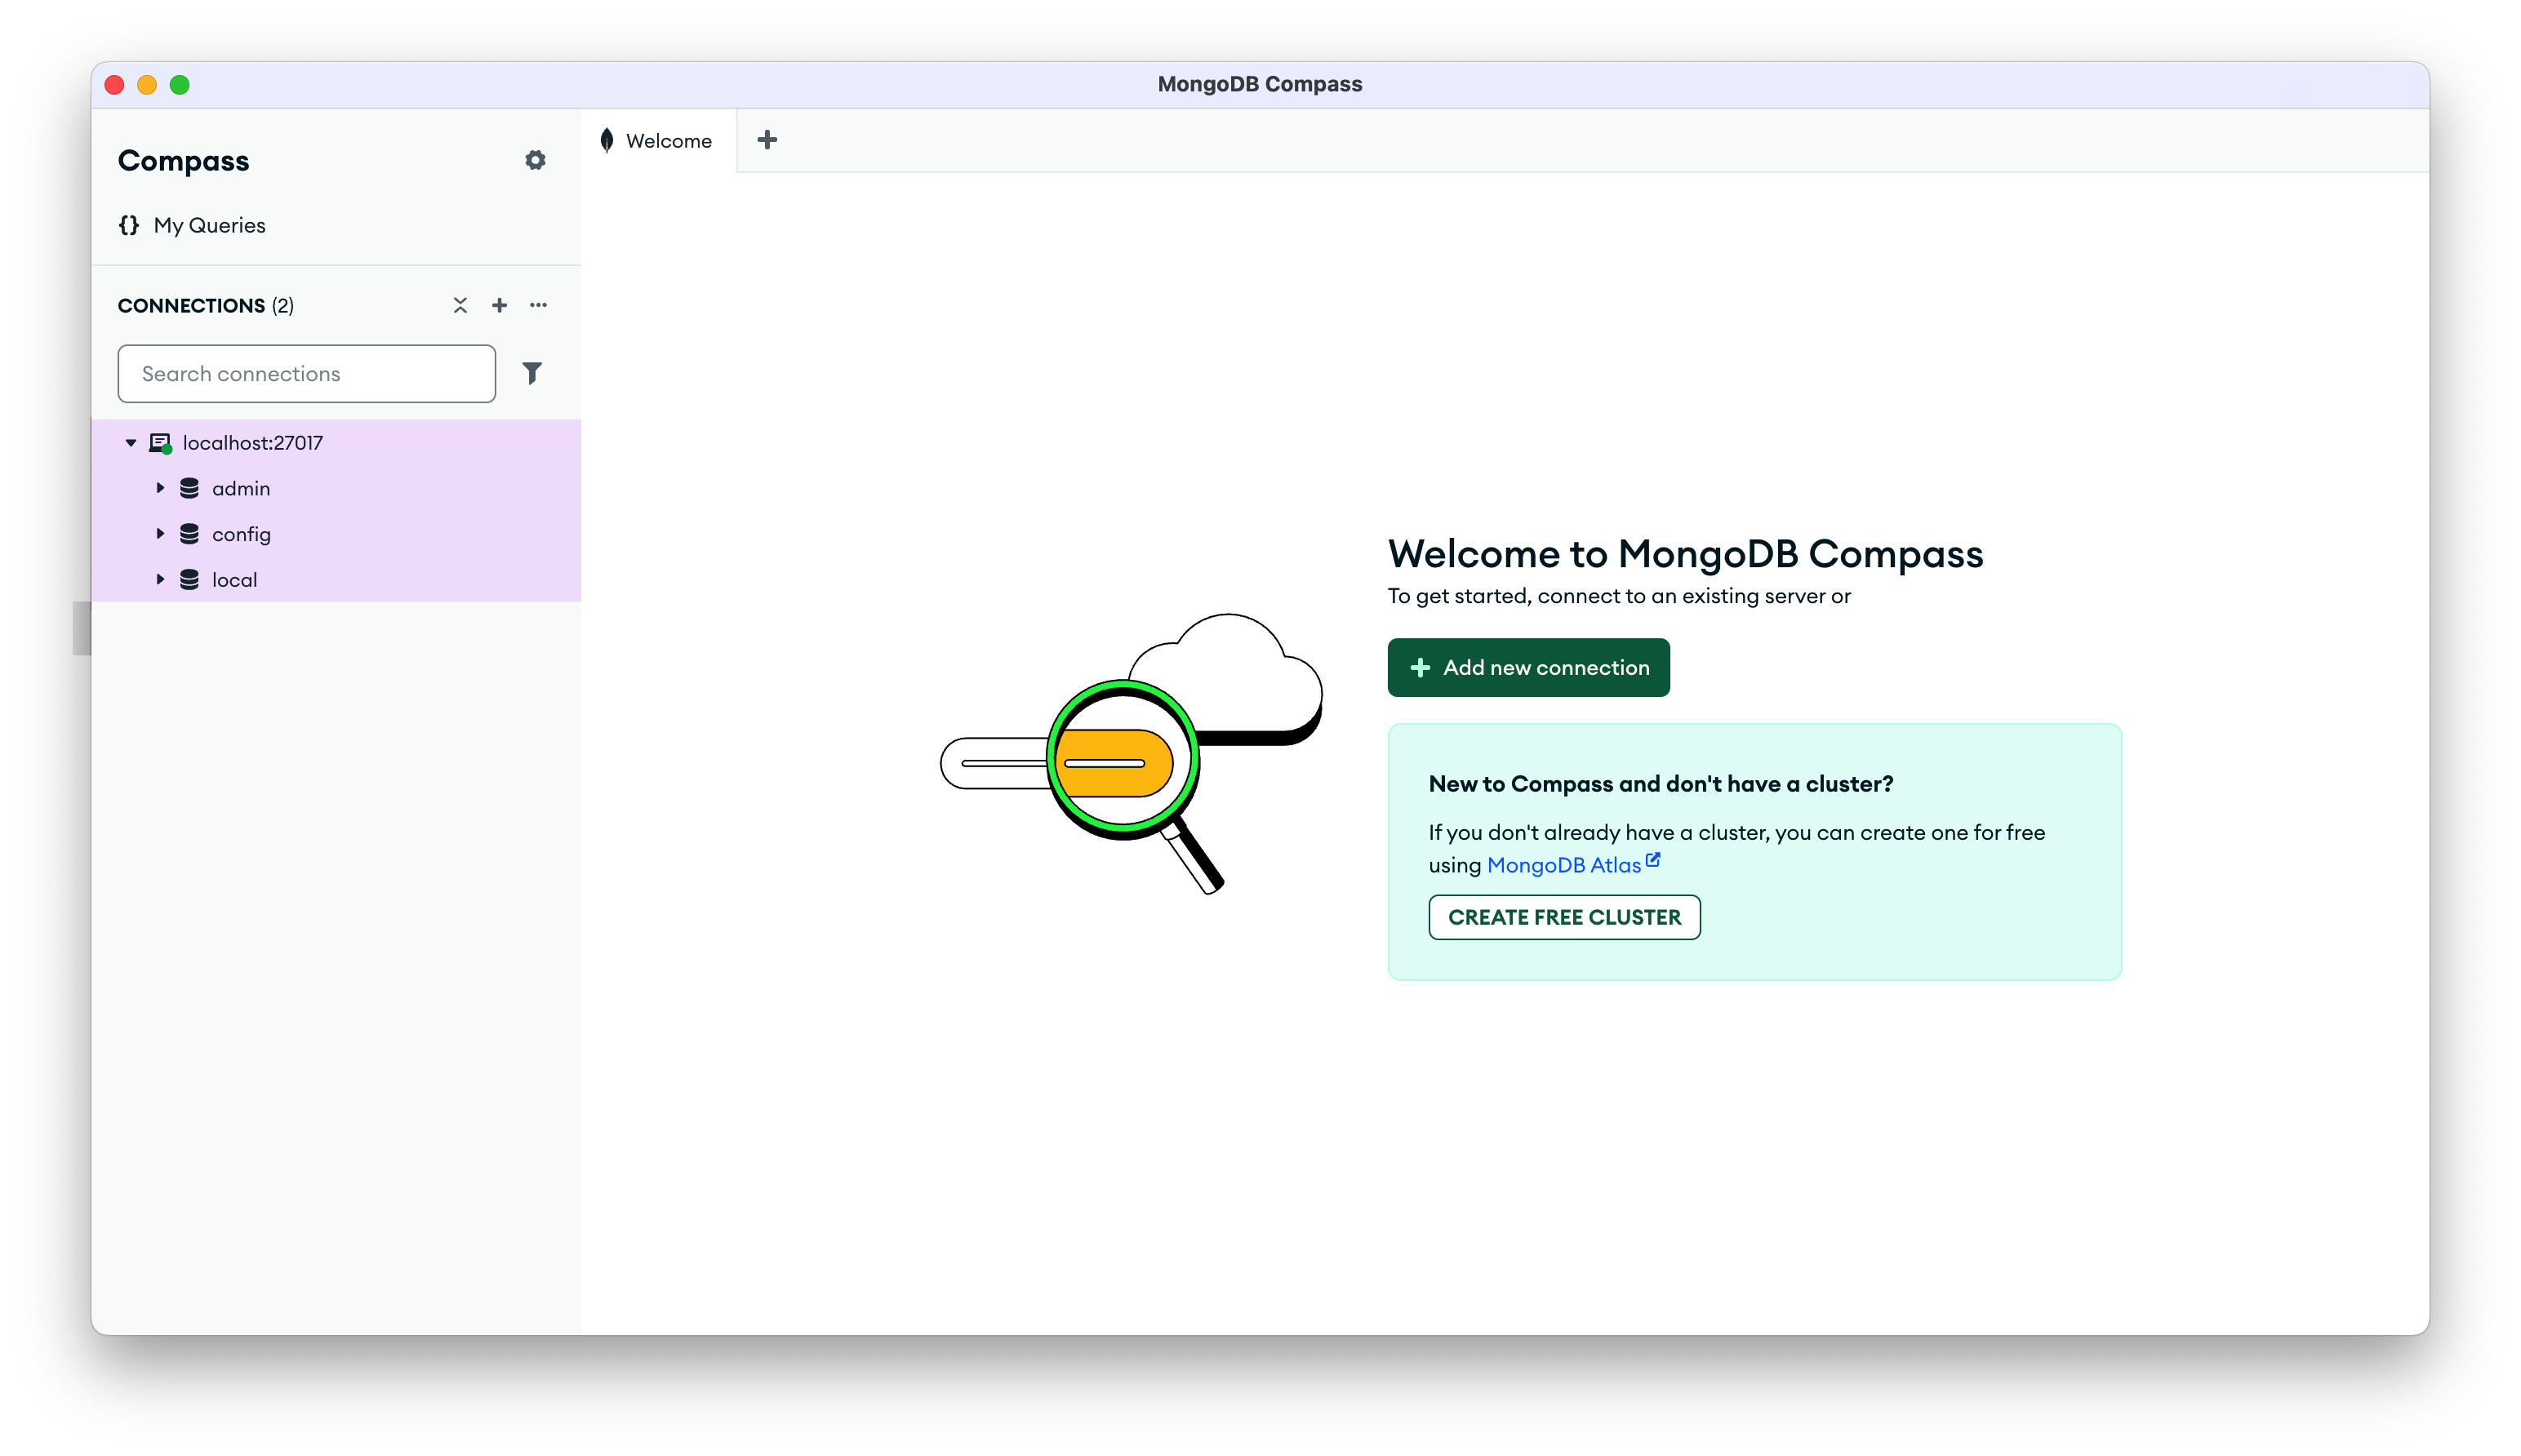
You're done when
mongosh gives you a prompt and Compass shows those three databases. Bring that to class on Tuesday.